Home » Articles posted by Anders Bengtsson (Page 20)
Author Archives: Anders Bengtsson
 Building groups in Operations Manager, with a bit of Orchestrator magic
Monitor the internet connection as a client
“Hello, is it IT support? My Internet is slow”
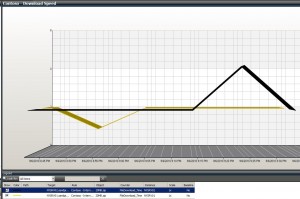
Have you heard that before? Last week a customer asked me if we could monitor how long it takes to download a file from a client workstation, and present it in a nice performance view in the Operations Manager console. Of course we can, with a script in a rule. The script downloads a file from Internet, measure the time it takes and reports it back to Operations Manager as performance data. You can control which machines that runs the script, so you cant select some workstations or machines in remote offices. If it takes more then 3 seconds it will generate a local event. If there is a problem downloading the file it will also generate a local event. You can configure Operations Manager to pickup this event and generate an alert. Thanks to Patrik the script can detect if the file we are trying to download is missing or if there are any other download related problems. I have attached the script I used, and below is the steps that you need to take to implement it.
To use this script, follow these steps
- In the Operations Manager console, navigate to the Authoring workspace, right-click Rules and select Create New Rule
- In the Create Rule Wizard, select to create a Probe Based/Script (Performance) rule, select a suitable management pack for example Contoso – Internet Download
- On the Rule Name and Description page, input a rule name for example “Contoso – Internet Download – Download 20 Mb file”. Select a suitable target for example Windows Server. Uncheck the “Rule is enabled” box.
- On the Schedule page, input how often you want to script to run. For example every 10 minutes
- On the Script page, clear the script text box and paste the script from the attached file. Configure the timeout to 5 minutes. Change the script name to ContosoDownloadscript.vbs
- On the Performance Mapper page, input
- Object: 20MB.zip
- Counter: FileDownload_Time
- Instance: select Netbios computer name from the menu
- Value: $Data/Property[@Name=’Contoso_PerfValue’]$
- Create the rule
Now you have a rule target to all Windows Servers. But it is disabled. To control which machine that is running this, create a new group, save it in the same management pack (important!) and add some windows servers as explicit members. These machines will run the script and download the file.
- In the Operations Manager console, navigate to the Authoring workspace, right-click Groups and select Create a new Group
- In the Create Group Wizard, input a group name, for example “Contoso – Internet Download nodes”. Select the same management pack as you used before, in my case Contoso – Internet Download
- On the Explicit Member page, click Add/Remove Objects
- In the search for drop down menu, select Windows Server. Then in the name field input the machine or machines that you want to use as watcher node and add then under selected objects
- Click next a couple of times in the wizard and then save and close it
To enable the rule against the machines in this group,
- Find the rule again under Authoring and rules
- Right-click it and select Overrides, Override the Rule, For a group, select your group
- In the Override properties window, select enable and configure the override value to TRUE. Click OK to save.
The next step will be to configure a rule to pickup the event. These are the two events that you want to generate alert on


- Navigate to Authoring workspace, right-click Rules, select Create a new rule…
- In the Create Rule Wizard, select to create a Alert Generating Rule, Event Based, NT Event Log (Alert). Select the same MP again, in my case Contoso – Internet Download
- On the General page, input a name, for example Contoso – Internet Download – Event rule. Select “Windows Server” as rule target. Uncheck the “Rule is enabled” check box
- On the Event Log Type page, select Application
- On the Build Event Expressen, input
- Event ID Equals 2
- Event Source Equals WSH
- On the Configure Alerts page, click Alert suppression…
- In the Alert Suppression window, select Event ID, Logging Computer, Event Source, click OK
- On the Configure Alerts page, click Create
Now we need to enable this for the machines that we use as watcher nodes. As we created this rule with “Rule is enabled” unchecked, no machines is running it right now.
- Find the rule again under Authoring and rules
- Right-click it and select Overrides, Override the Rule, For a group, select your group
- In the Override properties window, select enable and configure the override value to TRUE. Click OK to save.
The last step could be to create the performance view
- In the console, navigate to the Monitoring workspace
- Select the folder for your MP, in my case “Contoso – Internet download”. Right-click it and select New > Performance View
- In the Properties window input
- Name: Contoso -Â Download speed
- Show data contained in a specific group: Select your group, in my case “Contoso – Internet download nodes”
- Object: 20MB.zip
- Counter: FileDownload_Time
- Click Ok to save you diagram view
If you want to change the file that we download, or the destination folder, you need to modify the script and the lines highlighted below

If you want to change the default 5 seconds threshold on the download, you need to modify the following line

Download the script here, Internetdownload
Notification popup with Opalis
Today I needed to build some kind of extra notification when a special alert was generated in Operations Manager. As we were already working with Opalis, why not continue with Opalis? The result was a simple policy checking for a special alert (service stopped), if it is generated, it sends a popup message with msg.exe to a specific machine. Pretty simple, but another example how to solve things with Opalis.

There was another policy checking the service and restared it if needed, of course we could merge them into one policy. The “Notify by popup” is a “Run program” object with the following settings
- Program execution
- Computer: IP of target machine where to run the program
- Program path: C:\WINDOWS\system32\msg.exe
- Parameters: * /SERVER:NYSRV10 /TIME:120 {Name from “Get All New Alerts”}
- Working folder: C:\

The message on the target machine

…and the updated alert in Operations Manager, by the second policy.

Connect Opalis to Operations Manager
If you try to configure a connection from Opalis to Operations Manager 2007 you might get this error

That means that you need to install the Operations Manager Console first, as Opalis use files from that to connect to Operations Manager. You also need to reboot your Opalis machine before you can successfully connect.
Export agents to Excel
A common questions in the forums is “how to export a list of all agents to Excel?” You can do that with Operations Manager shell. The Operations Manager command shell is built on Windows PowerShell. The Operations Manager command shell extends the Windows command shell with over 80 additional small utility programs, called cmdlets, which can either be run directly from the command shell prompt or called from within a batch file or script. To export a list of all agents and some info about them run the following command
get-agent | select Displayname,InstallTime,InstalledBy,Version | export-csv -notype c:\agents.csv
That will give you a CSV file, C:\agents.csv. Open the file with Excel, select all the data, click the “text to columns” button and choose comma delimeter. That will convert your data into nice columns.

…and there you have your list in Excel with nice columns
Best of MMS [Stockholm/Sweden]
Best of MMS is approaching! Only a couple of weeks away now!
I will deliver two sessions at Best of MMS 2010 in Stockholm/Sweden. My first session “Operations Manager 2007 R2 tips and trixâ€Â is a level 400 session with a lot of good tips from the field. I will show a number of custom solutions and solutions to problems I often see at customers. I guess there will also be some Opalis demos in this session too…Â
My second session is toghether with Microsoft Sweden, “Reduce support costs and improve business alignment with System Center Service Manager”, it´s a level 200 session, in which you will learn how Service Manager lowers the cost of incident and problem resolution and provides a streamlined approach to change management by providing integrated knowledge of configuration items and the ability to easily assess the current health state of IT services by seamlessly integrating the activities between Service Manager, System Center Operations Manager and System Center Configuration manager.
There will be a number of System Center experts speaking at the event, for example my Operations Manager MVP colleagues Björn Axell, Gordon McKenna and Simon Skinner so bring all your Operations Manager questions!
 See you in Stockholm! More info about the event here

Add history tab to your custom forms
In this post I showed you how to create a custom CI class, a form and seal the management pack. If you want to continue working with your form and add the history tab you can follow this blog post.
Patrik have created a form templates for the Authoring Tool that contains already implemented controls like the “Related Items†control and “History” controls. You can download his template here. In this example I will add the history tab to the form created earlier in this post.
- Download the package and extract all files
- Copy CustomFormTemplates.dll to a suitable folder, in my case C:\MPs
- Open the Authoring tool and your MP where you want to create a form . In my case I will use the MP and form created in the earlier post. I will replace the form with a new form
- In the Management Pack Explorer, right-click Forms and select Add Custom
- In the base class window, select Contoso.Projector as base class, click OK
- In the Add custom form window, input
- Internal name: contoso.projector.formB
- Assembly: CustomFormTemplates.dll
- Type: HistoryOnlyTemplate
- Click Create
- Add date pickers, labels and text fields as in the earlier post

- When done, delete your old form, in my case contoso.projector.form
- Seal your management pack according to my earlier post
- Save your management pack and close the Authoring Tool
- Start power shell as administrator, goto your MP folder
- Make sure you have the selaed MP (.mp) and the CustomFormTemplates.dll in the same folder
- We need to create a MP bundle as we have a custom dll (Patrik form templates) that needs to be inserted into Service Manager.
Run, new-mpbundle.ps1 Contoso.Projector.Library.mp Contoso.Projector.Library (new-mpbundle.ps1 is included in the package from Patrik) - Verify that you now have a new .mpb file in your folder
- Import the new MPB file into Service Manager
- Change something on a project and then open the CI again and look at the history tab


How to create a new CI class and a new form
The RTM version of Service Manager Authoring Tool is released! The new versions allows you to do some new things that we did direct in XML before. In this blog post I will show you how you can create a new CI class, add a custom form to work with your class and also seal your management pack. The first thing you need to do is install the RTM version of the Authoring Tool. You can download it here.
In this example we will build a custom CI class named contoso. The first part will create a new CI class named Contoso.Projector.Library, we will then add a couple of properties that describes a projector.Â
- Start Service Manager Authoring Tool (v 7.0.5826.620)
- Click “Create a new Management Packâ€
- Input Contoso.Projector.Library as file name, click save
- Select the top node in the management pack explorer, in the details pane, input “Management Pack that extends the CMDB with a projector class.†as description
- In the management pack explorer, right-click Classes and select “Create Configuration Item Class…â€
- In the create class window, input Contoso.Projector and click Create
- Change the class name and description if needed
- Click “Create Propertyâ€
- In the create property window, input for example “Resolutionâ€. Repeat step 9 for each of the following properties
- Resolution
- Name
- Location
- Contrast
- Manufacture
- Number
- Purchase
- WarrantyEnd
- Vendor
- Monthly
- Select the Name property and change Key to TRUE. This means that the Name property will be the single property identifying a unique instance of the projector class.
- Select the automatically added property named Property_X. Delete it.
- Â When you select a property you can change details in the details pane. Change the data type for your properties, for example change WarrantyEnd and Purchase to data type Date Time. That means that the data should be in date format.
- Change some of the names to a better display string for example
- Purchase, Purchase date
- Number, Serial Number
- WarrantyEnd, Warranty End
- Monthly, Monthly Price
- Change Name to minimum length 2. You need to input at least two letters

That should do it; the class for projectors is done. Next step is to create a form that we can use to add projectors in the service manager console.
- In management pack explorer, right-click Forms and select Create
- In the base class window, select Contoso.Projector
- In the create form window, input contoso.projector.form
- Drag and drop a label for each property from the form customization toolbox to the form design window
- Drag and drop a text box for each property where the user will input text strings
- Drag and drop a date picker for the purchase date and warranty end date properties
- In the detail pane you can change the font and text size for any text
- The next step is to bind each text box to a property of your project class. Select a text box, for example Name and click binding path in the details pane.
- In the Binding Path window, select Name
- Repeat step 9 for each text box and date picker

That should do it! You now have a management pack with a new class and a form that we can use to create CIs for the new class.
We should seal the management pack before we import it. That would give us a couple of benefits, for example we can store views and folders in another management pack and access objects related to our projects management pack. We can’t create views and folders in the current version of the authoring tool so good practices could be to save them in another unsealed management pack and all core things in a sealed library management pack.
Next step is to seal the management pack. To seal the MP we will use .NET framework strong name utility (sn.exe).
- Open a command prompt
- Navigate to the folder where SN.EXE is located, in my case C:\Program Files (x86)\Microsoft SDKs\Windows\v6.0A\bin\.
- Run SN –k mykey.snk
- Verify that a new key pair was generated, for example a mykey.snk file
- Switch to the Authoring Tool again
- In the management pack explorer, right-click the top node, in my example Contoso.Projector.Library and select “Seal Management Packâ€
- In the Seal Management Pack window, select a suitable Output Folder, for example C:\MPs
- Browse and select your key file that you generated in step 3
- Input a company name, for example Contoso
- Click Seal
- Verify that seal succeeded, click Close
Now, import your management pack into Service Manager. Remember to import the management pack from C:\MPs, your sealed version. To create and view projectors you need to create a folder and a view
- In the service manager console, go to the Configuration Items workspace
- In the tasks pane, click Create Folder
- In create new folder window, input Projectors as Folder Name. Create a new management pack named Contoso.projector.config and store the folder in it. We can’t store the folder in your Contoso.projector.library management pack as it is now sealed.
- Select your new Projectors folder and select Create View
- In the create view window, input “All projectors†and view name. In the Criteria tab select Contoso.Projector as class. Click OK to save the view.
- Select your new “All projects†view. Create “create contoso.projector†from the tasks pane. Contoso.Projector is the name of the class we created in the authoring tool.
- In the projector form, fill in the text fields and click OK

Now you have a new class in your CMDB, you can store information about projectors. You can use your new form to input the information and your new view to review it.
Service Mapping
A common task when working with Operations Manager and Service Manager is that you need to create distributed applications and business services. Often you don’t have knowledge about the service, you don’t know where to start or what to include and not to include. I found a good document around this, Service Mapping, from Microsoft Operations Framework (MOF). This document is intended to introduce the content, structure, development, usage and benefits of service maps. It will
- Show you a service map
- Demonstrate how to build service maps
- Suggest how to use service maps
The document also includes information how to use service maps in Operations Manager and Service Manager. You can download the document here.
Opalis lab in the hammock
I have spent some time during my holiday playing with Opalis. Opalis is really exciting and it will be interesting to see where Opalis will fit in together with existing authoring tools, diagnostic tasks, recovery tasks, manually tasks and workflows in for example Service Manager.
Opalis is an automation platform for orchestrating and integrating IT tools to drive down the cost of datacenter operations, while improving the reliability of IT processes. It enables IT organizations to automate best practices, such as those found in Microsoft Operations Framework (MOF) and Information Technology Infrastructure Library (ITIL). This is achieved through workflow processes that coordinate System Center and other management tools to automate incident response, change and compliance, and service-lifecycle management processes. More info at source.
My first scenario was a simple account creating scenario. I build a windows form application to generate files. These files were the start of my Opalis policy. The workflow first decided if it was about a service account or a user account. Then it includes two sub policies, one for service accounts and one for user accounts. When the sub policy is complete it returns the result to the main policy which will inform “someone” by e-mail about the new account.

This is the main policy. It uses a custom start, and I trigger it with Opalis remote trigger. The rule file looks like

For more information about remote trigger, click here. The first object in the policy reads the latest .user file in a specified folder. I generate the .user file with a small Windows Form Application I wrote in Visual Studio. As you can see in the picture below it creates the .user file and the lines tells Opalis in this case that it will generate a user account for someone named John Richard Doe.

I use that object to get the latest file if there are multiple .user files, then all other objects use the output from this object. For example step two which reads the second line in the file gets the file name from the first object.

Depending if the first line in the file is “ServiceAccount” or “UserAccount” the main policy will trigger the “Service Account” policy or the “User Account” policy. My two “sub policies” looks like this
The first one is for service accounts. It checks if the account already exists in Active Directory. If it does it will add a single copy number after the account and create it. For example you order a service account for server FILE110 and the account will be used with MOM, the account from this policy will normally be SVC-MOM-FILE110. But if that account already exists it will be SVC-MOM-FILE1101. The policy then publishes the data so the main policy can access it.

The second policy is used for user accounts. It starts by generating a SAM account name and checks if it exists in Active Directory. This step is a little more advanced than for service accounts, as the sam account name will be the tree first letters from the first name and the tree first letters from the surname. If the SAM account name already exists it will create a new account with including the first letter from the middle name. For example John Richard Doe will be JOHDOE, but if the account already exists it will be JOHRDOE. The policy then publishes the data so the main policy can access it.
As you can see these two are almost identical. The main policy continues and deletes the .user file and sends e-mail notification about the new account. I have added a lot “Logfile” objects as I want Opalis to write a profitable logfile. That is always good. If you want to play with this workflow you can download it here, ContosoOpalis. You will find a number of good Opalis resources here and if you want to download a trail version of Opalis you can do that here.
Merge two incidents
I have seen the question at Technet forums a number of times, is it possible to merge to incidents? In this post I have built a idea how to do it. When you run it you input two incident numbers. The first number is the incident that you want to keep, and the second number is the incident that you want to close. The script will move all comments from the action log in the first incident to the second, so your comments will be moved to the incident that will be keep open. This solution require smlets that you can download here.
I made some notes about how it works…


It includes a couple of scripts
- MergeInc.vbs, main vbscript
- GetComments.ps1, powershell script that export comments from the incident that you want to close. All comments are stored in C:\temp\export.txt
- UpdateIncident.ps1, powershell script that update the incident that you want to keep. It will be updated with all the old comments, in one large private comment in the action log
- CloseIncident.ps1, powershell script that will close the incident that you don’t want to keep anymore
You can run MergeInc.vbs as a task from the console, the same way I do with a script in this post. You could of course pick up a incident ID from the console when you run the console. In this example I have two incidents, IR67 and IR69. For some reason IR69 is a double of IR67 so we want to move the comments from IR69 to IR67 and close IR69.

Run the task and input IR69 and IR67.

Then IR69 is now closed and there is a comment in the action log

and if we look at IR67 the action log is now updated with all the old comments from IR69

It is not a optimized enterprise ready solution but it works. You can download my scripts here, Merge.
Recent Comments